
Maintenance is an important aspect of keeping everything in order, be it organising files or your business website. Anything that is well-maintained and up to date keeps you at the top of your game. In this post, we will be dealing with website maintenance. Imagine you run a WordPress powered online business and need to update your website to include certain new features. These features can range from revamping the design, content, fix a security flaw or a plugin etc. To achieve this, you will most likely have to disable your website or a particular page temporarily, in turn, displaying a different page stating the issue to the visiting user. If you don’t do this, your website might display a 404 Error, a broken page etc.
In this article, I’ll walk you through the maintenance mode in WordPress. I will also cover why and how to put your WordPress site in maintenance mode.
What is WordPress Maintenance Mode?
WordPress Maintenance Mode is the state you put your website into when you wish to make major changes to the site that may take a long time. If your site is broken or inactive for a while, it can affect the user experience, especially if you get heavy traffic. At such a time it is advisable that your website is offline and a splash page saying ‘Coming back shortly’ or a similar message is put up.
Some situations during which you can put your WordPress site in maintenance mode are:
- When you are configuring a new theme or plugin for your website
- Redesigning your website or making other cosmetic changes
- Fixing critical security bugs
- Fixing website issues that affect customer data etc.
Having seen what WordPress maintenance mode is and the common reasons to put your website into the maintenance mode. Let us now move on to ‘how’ do you go about it.
How to Put your WordPress Site in Maintenance Mode
We shall cover two ways of doing so:
-
Manually Using the Built-in Maintenance Mode feature
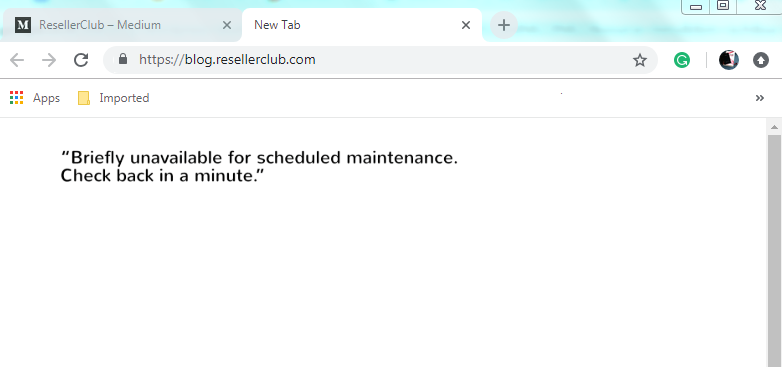
The built-in maintenance mode in WordPress in an automatic feature that runs whenever you run a WordPress update for updating either themes, plugins or core files. This happens with the creation of a .maintenance file in your WordPress root. During this time, if any visitor lands on your site, the following automatic message is displayed.
-
Using WP Maintenance Mode Plugin
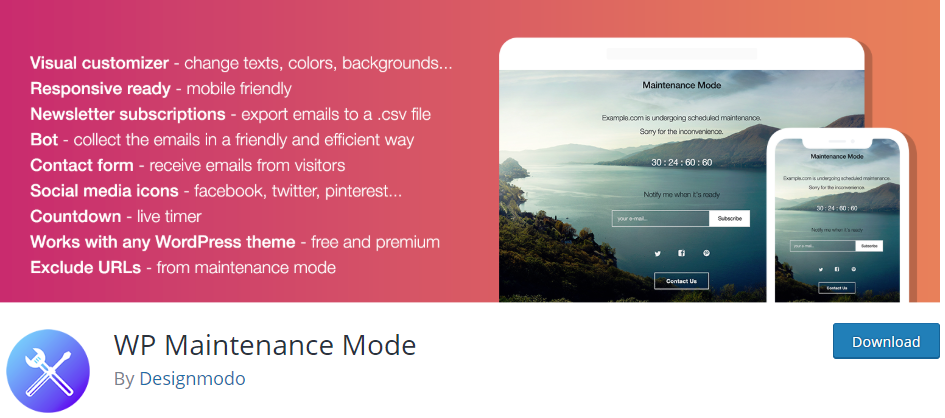
The WP Maintenance Mode plugin is an open-source software having over 600,000 active installations. It can be used for creating a splash page that can be used when your WordPress website is down for maintenance or if you are launching a new website.Some of the features of this plugin are:
- It has multiple templates for Landing Pages and Coming Soon pages
- It supports WordPress multi-site
- Allows customizing colours, text and background
- It is GDPR compliant and
- Excludes URL from maintenance.
Let us now see, the steps required to setup WP Maintenance Mode Plugin:
-
Setup Maintenance Mode Using WP Maintenance Mode Plugin
Once you install the WP Maintenance Mode plugin, you need to configure the plugin. For that go the Settings and then select WP Maintenance Mode.
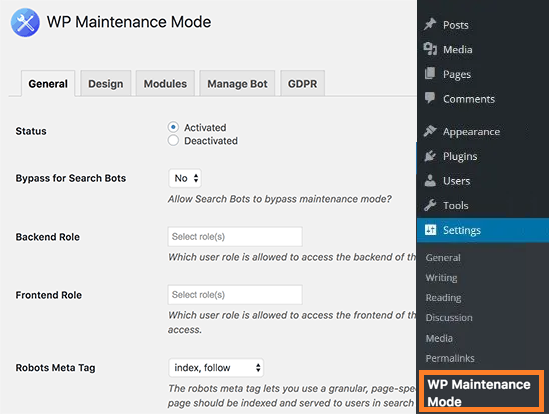
Key things to note:
- There are 5 tabs General, Design, Modules, Manage Bots and GDPR. Let us first cover, the ‘General Tab’.
- The Status is by default selected as ‘Deactivated’ when you need to put the WordPress site in Maintenance Mode, select ‘Activated’
- Should you want Search Bots to see your website despite it being in the maintenance mode, select the option as ‘Yes’. The ‘Yes’ is recommended if your site is an already established one
- The rest of the options on the General Tab page are fairly self-explanatory. Click Save once you make changes and proceed to the next
-
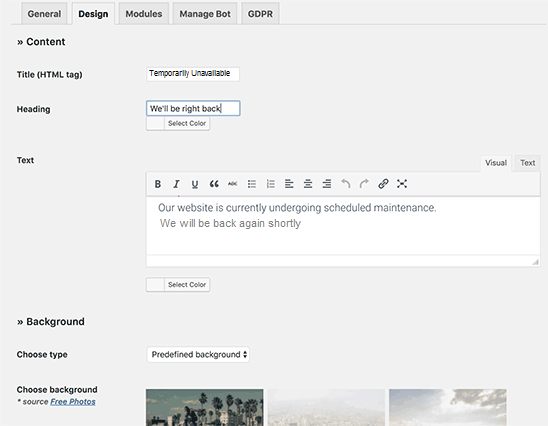
Creating Your Own Splash Page for Maintenance Mode
Next is the Design Tab. Using this tab, you can design the splash page and customize it for text, colour, background and even the heading. Once you are done, click Save.
-
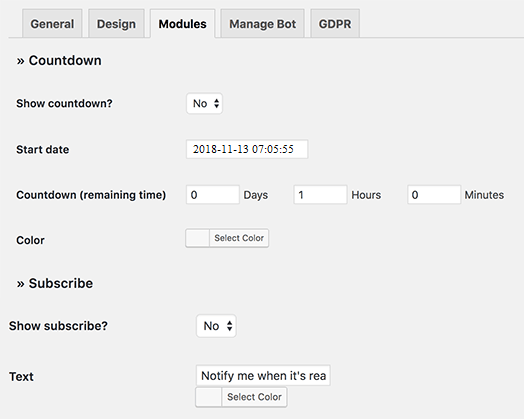
Modules
The third tab is ‘Modules’. Using this tab, you can add the countdown specifying when your site will be up and running. If you have subscribers then, you can even personalize the module so that they are notified when the site will be back.
-
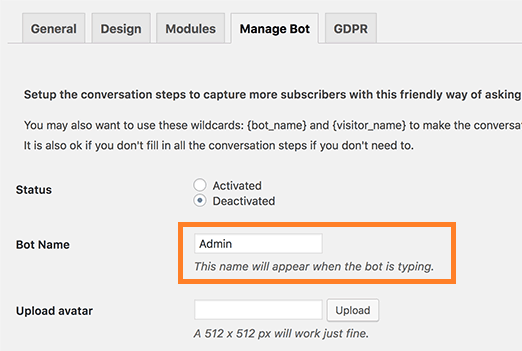
Manage Bot
Should you activate the Bot here, then it will reverse the setting for Bot on the General Tab and vice – versa.
-
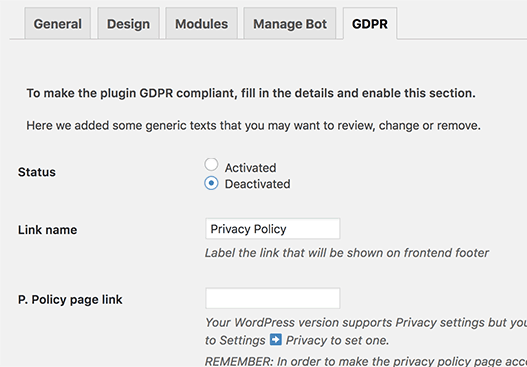
GDPR Complaint
Finally, if you have any sensitive data that you want to collect or anything that requires customer approval or related to privacy then simply activate the GDPR status in the GDPR tab.If you’re still trying to understand what is GDPR and should you Activate or Deactivate it for your website, read about it here for better clarity.
 Having finished all the steps, your maintenance mode is now ready to be displayed to the world.
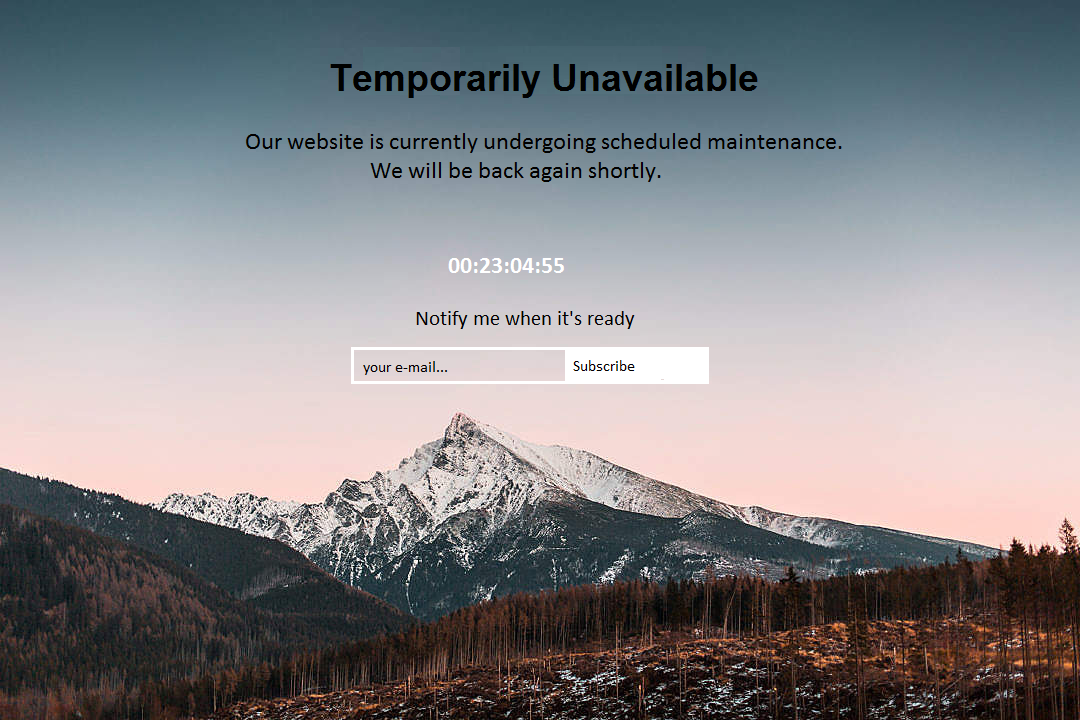
Conclusion
Putting your WordPress site in maintenance mode is a better way to complete maintenance activities instead of having a broken link. Just follow these steps and you’ll have your page ready in no time. For timely WordPress updates, it is best to have WordPress Hosting as your hosting for your WordPress website.
If you have any queries or suggestions, feel free to ask them in the comments section below.
There is no ads to display, Please add some


