

In our previous 3 posts of the WebPro Panel series, we introduced you to our new WebPro Panel, its features, easy order management, as well as, brand new customer management features for the web pros. Moving ahead, in this final post of the series, we will explore how you can manage your Reseller Account in the WebPro Panel.
Account Management basically means managing your Reseller account viz. modifying your contact details, password, etc. as well as, customizing the URL of your customer’s panel. So without further ado, let us begin.
Key Segments of Account Management
There are 3 key segments when it comes to managing your account in the WebPro Panel.
- Changing your Account Details
- Changing your Contact Details
- Changing your Account Password
- Viewing and changing support pin
- Adding funds to your account
- Billing Section
A: Changing your Account Details:
This comprises of three important things i.e changing your contact details, your account password and your support pin.
- Changing your Contact Details
Your contact detail covers aspects like email address, contact number, postal address. Should at any point of time your contact number changes or your address both email and postal, you would want to modify them in your Reseller account as well. The ‘Contact Details’ page of your WebPro Panel allows you to change these easily. Let us see how
Step I: Login to your WebPro Panel
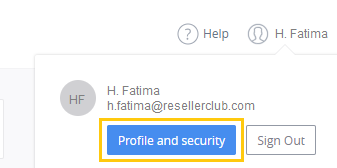
Step II: On the top right of the dashboard and you will see this icon Click on this and the following window appears. Click on the Profile and security tab.
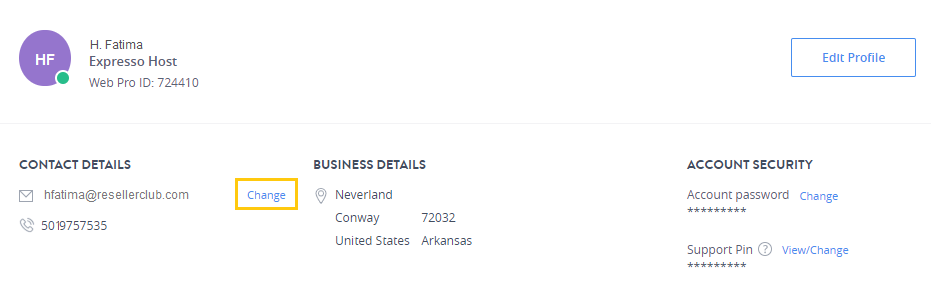
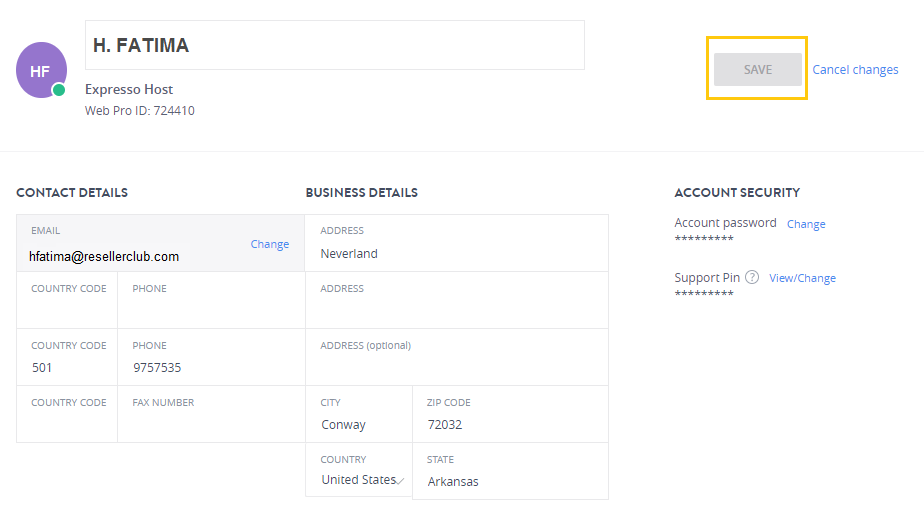
Step III: A new window opens where you can modify your details like email address and contact information.
I: To modify your email address- Click on the ‘Change’ button in the Contact Details page.
- After clicking on ‘Change’ a new window pops up. All you need to do is go to your original email address and enter the 6-digit code you receive in your inbox. This acts as security verification for your account and verifies the authenticity of the request.
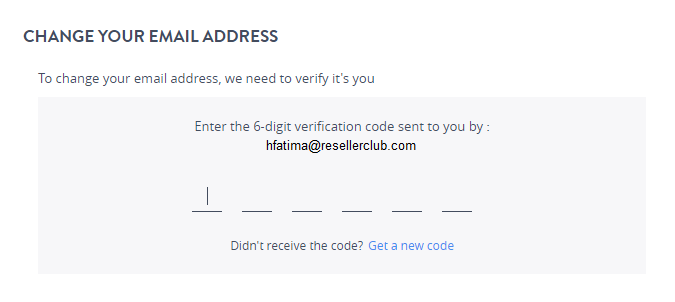
- After your authenticity is verified, you can now change your email and click on the ‘Save’ button.
II: Changing your Contact Details
- On the same window, if you want to change your ‘Contact Details’ go to the right-hand side and click on ‘Edit Profile’
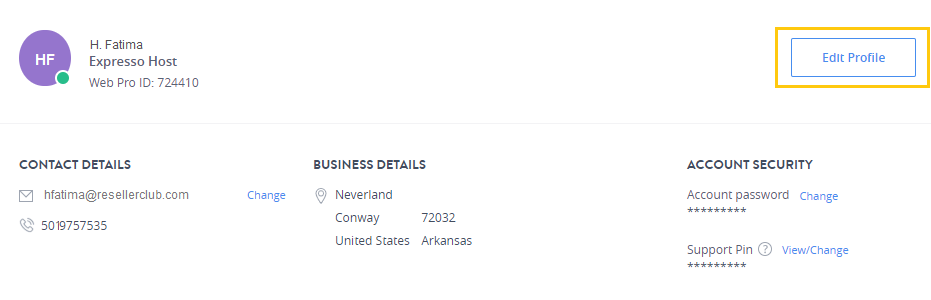
- A detailed page opens and here you can update all the contact details you wish to change, like phone number and business details. Once done, click on ‘Save’ on the top-right side.
- Click on the ‘Change’ button in the Contact Details page.
- Changing your Account Password
Account Security is comprised of your ‘Account Password’ and ‘Support Pin’.
Step I: To change your Password, click on the ‘Change’ button beside the label ‘Account Password’
Step II: Enter your current Password and click on ‘Proceed’
Step III: Enter your new Password and Confirm it before clicking on the ‘Save’ buttonNote: For security purposes please ensure that your password length is between 9 to 16 characters and a combination of uppercase and lowercase letters, special characters, and numbers.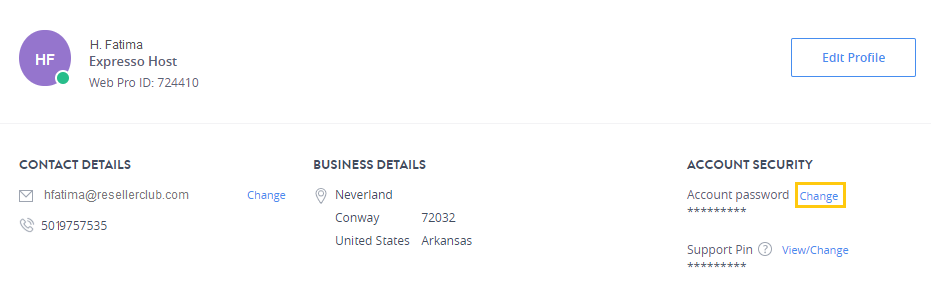
- Viewing and changing support pin
Step I: To change your ‘Support Pin’ click on the ‘View/Change’ button beside “Support Pin” under “Account Security”.
Step II: A new window pops up displaying your current 4-digit support pin
Step III: If you wish to change the pin, click on this icon
Step IV: Enter your new pin and click ‘Save’Note: Keep changing your support pin on a regular basis and avoid repetition and common pins.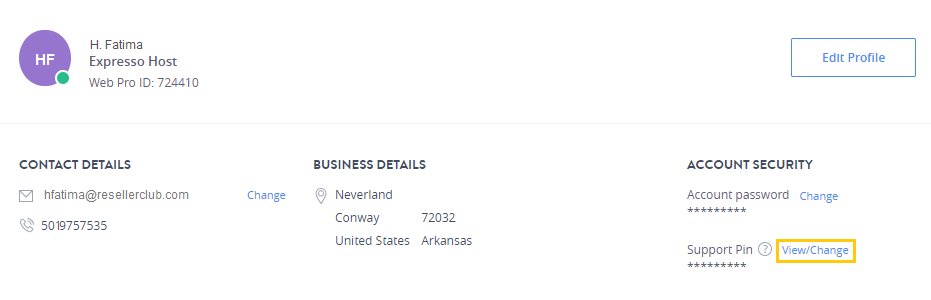
B. Adding funds to your account
One of the important features of WebPro Panel is the ability to purchase on the go i.e without adding funds to your account. However, adding funds to your account can be useful especially when you wish to purchase a product quickly. In the new WebPro Panel, the payment gateways have been integrated into the WebPro Panel and this eases the process of adding funds to your account.
Let us see the steps that are involved in adding funds to your account through the WebPro Panel.
Step I: On the left vertical sliding bar, click on ‘Add Funds’ 
Step II:
- Adding the funds to your account:
Enter the amount you would like to add to your wallet. The system automatically calculates and deducts any transaction fees and pending invoices from the amount you want to add to the wallet. In our case, there were no pending fees and invoices so the entire amount will get added.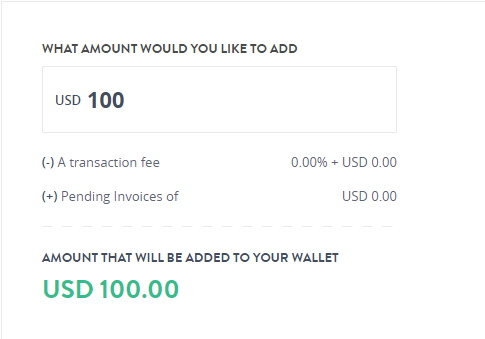
- Checking the balance
Under the section YOUR NEW WALLET BALANCE, you can now see the final balance that your wallet will have. This balance is a total of the previous wallet balance and the new amount that you will be adding to the account.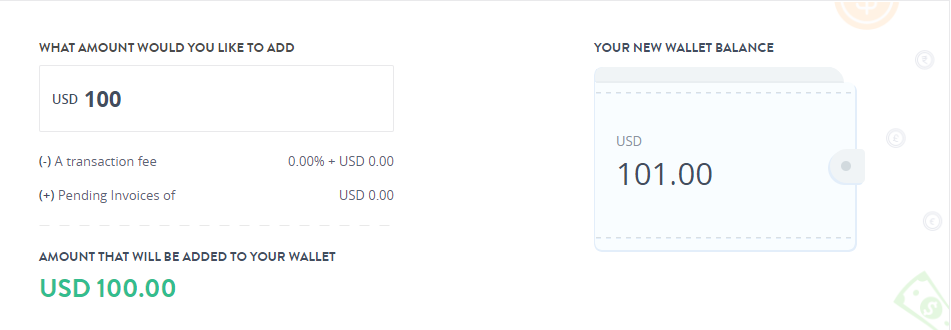
- Select the Payment Gateway
- Now, that you’ve checked how much balance will be added to your account, you need to add funds from the payment gateway to your account
- Depending on your preference you can choose to add funds to your account from either Visa/MasterCard or WebMoney Gateway. Select your preference and click on ‘Add Funds’
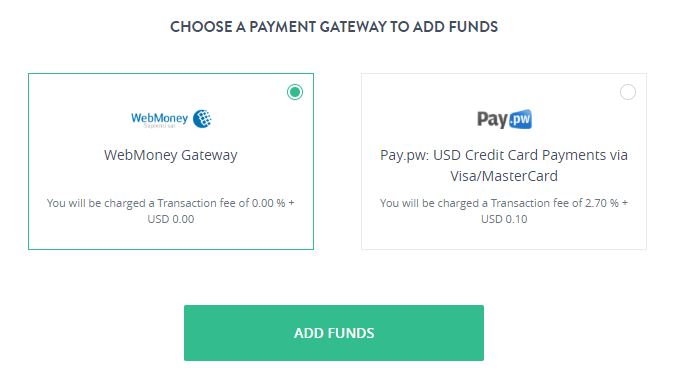
- You will now be redirected to the Payment Gateway page where you can add the necessary details and proceed with the payment
- Once the transaction is successful, funds will be added to your account and you can proceed with purchasing your products.
C: Billing Section
The billing page can be viewed from the vertical slide bar on the left. The billing page displays all the transactions associated with your account and orders.
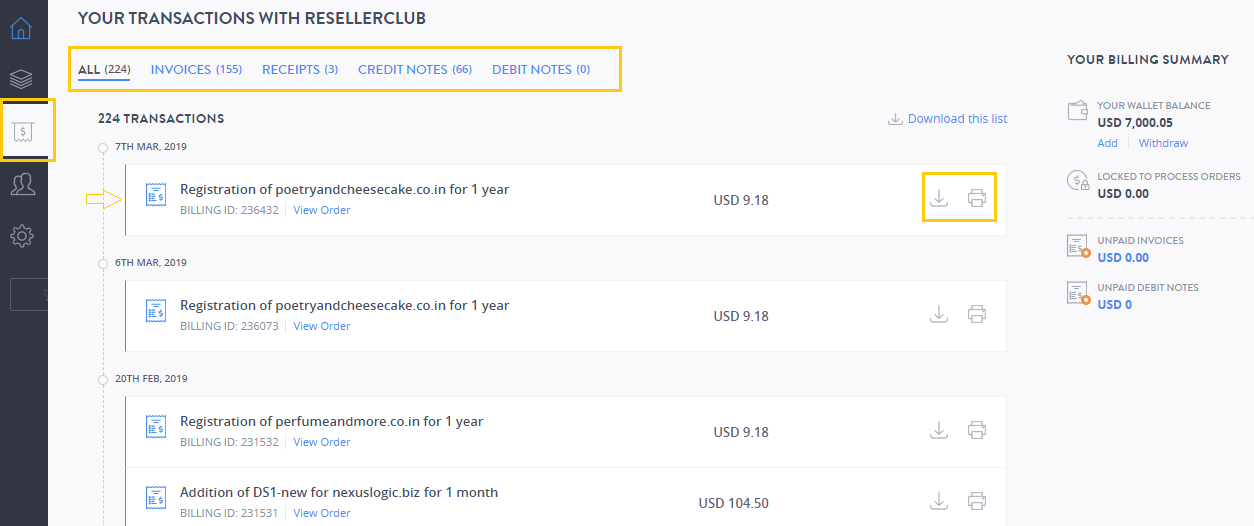
The following activities can be performed on the billing page:
- You can view, print and download invoices, receipts, credit notes and debit notes
- Each transaction can be differentiated by means of a colour code
- Green indicates credit notes and receipts
- Blue indicates invoices
- Red indicates debit notes
Conclusion:
With this, we come to an end of understanding account management in the WebPro Panel. This was the final segment in our four post series on the WebPro Panel.
If you are a reseller associated with us, you must have used the old panel and this series on the WebPro Panel hopefully shows you the careful improvements we have made to ensure that you continue having the best tools at your disposal to help your business effectively. The WebPro Panel is an easy, intuitive panel that allows you to manage your customers and orders with ease. The integration of payment gateways, the introduction of a hassle-free product purchase experience without adding funds, revamped order management and last but not the least, a brand new customer panel are all features that we feel will make your life that much easier and help you focus on what truly matters.
If you haven’t read our previous posts and are wondering about the WebPro Panel and how it came to be, then you can read all about it here in the following blogs.
WebPro Panel Part I: The Introduction
WebPro Panel Part II – An all-new Order Management Experience
WebPro Panel Part III – The Next Step – Managing your Customers
Note: We haven’t migrated our customers to the new WebPro Panel, we’ll be upgrading our customer in phases.
Do you have any comments or views on the WebPro Panel? If yes, do leave them in the comments box below. Also, if you have any topic suggestions, you can leave them in the comments section too. We’ll be back soon with another interesting post soon.
There is no ads to display, Please add some


