

Have you been running flawless email operations on Mailchimp by using the Mailchimp integration for Shopify? For some context, as we mentioned in the previous article, Shopify and Mailchimp have stopped the first-party support for each other’s users. You’ll need to build a new workflow for your emails to revive the operations (and improve it while you’re at it) to keep your store’s most important marketing channel at its pace.
Zapier delivers smart workflows in the form of conditional workflows that are termed as ‘Paths.’ You can set conditions that will be applied by your Apps to take different paths for different conditions.
Now, let us look at the process for bringing in the Zapier integration:
Bringing Zapier between Mailchimp and Shopify
In case you’re unaware of how Zapier works – you create a ‘Zap’ which consists of two or more apps wherein one of the apps’ actions acts as a trigger and the other is used to run a preset function triggered by the first app. For example, between Google Forms and Gmail, you could set up a ‘Zap’ on Zapier to send a confirmation email to all the people who RSVP’d ‘Yes’ to an event participation form and more still, we could add as my steps as you like with all the supported integrations Zapier has.
We’re going to walk you through how this works for connecting Mailchimp with Shopify, both of which are integrations supported by Zapier.
Setting up Shopify Triggers
To automate Mailchimp operations on Shopify, we’ll have to set the events that trigger an action on Mailchimp – For example, if we want every newly registered user on your Shopify store to be automatically added to a specific list on Mailchimp, ‘New Customer’ will be a trigger on Shopify. Let’s see how to complete setting up the same function.
Step 1
Create an account and log in to Zapier.
- Once you’ve logged in, you’ll be greeted by the Zapier dashboard.
- Once you’re in there, click on ‘Make a Zap’ button on the top right side of the page.
- You’ll be asked to input the trigger app for the Zap. In our case, we’ll keep ‘Shopify’ as the trigger app as we want the automation to be based on events happening on your Shopify store.
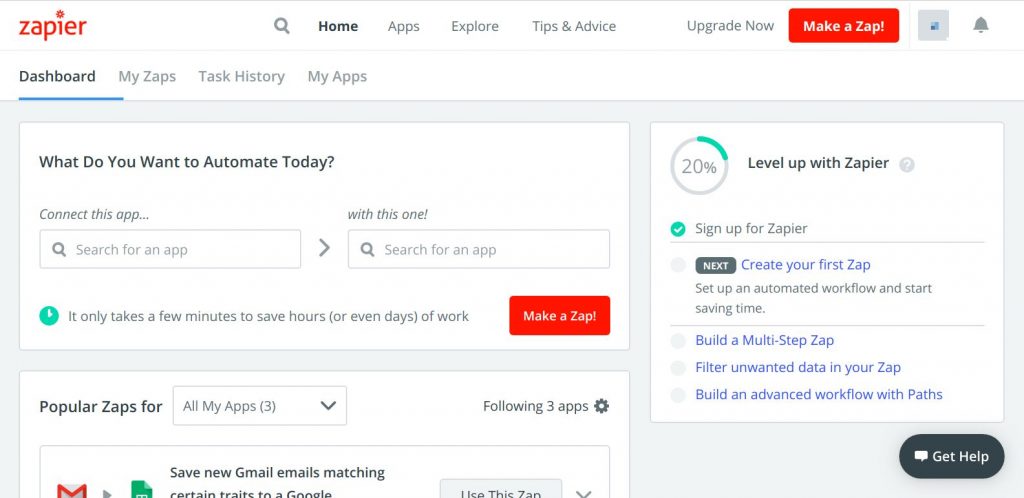
Start typing Shopify in the search bar below and you’ll see Shopify appear in the suggestions below – click on ‘Shopify’ to proceed.
Step 2
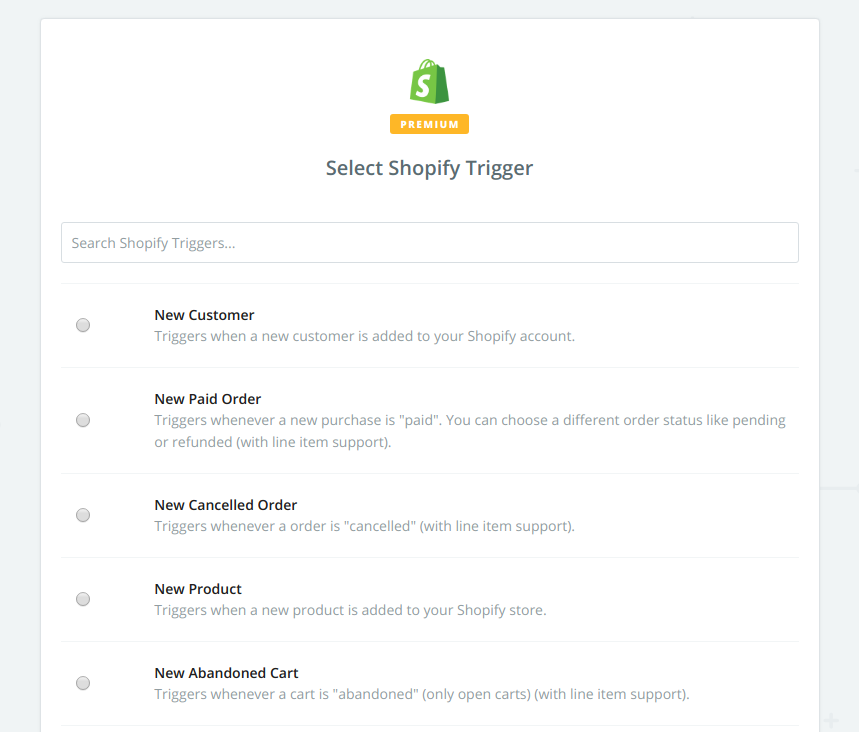
You’ll be asked to select the trigger event, i.e. what event/activity do you want on your Shopify store to trigger the action on Mailchimp. There’s a rather long list of triggers on Shopify – we’ll use the ‘New Customer’ trigger.
After selecting the trigger event, we’ll continue to a page that asks to log into your Shopify Store to be able to link your store with the Zap. Continue by clicking ‘Connect an Account’
Step 3
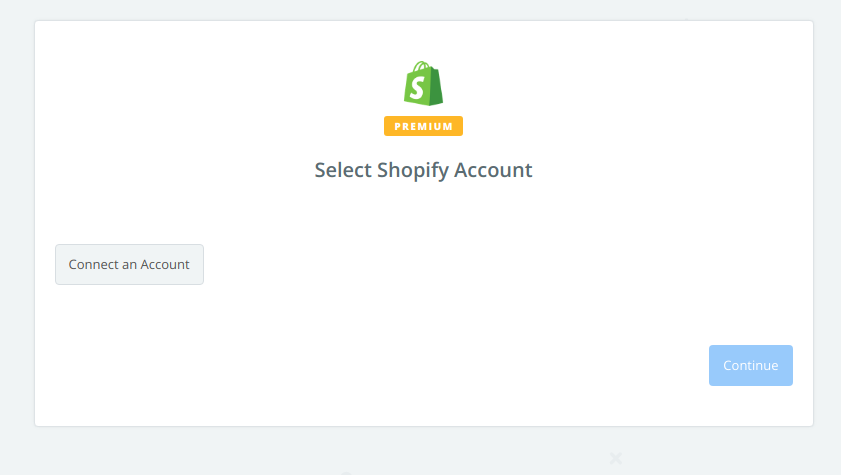
You’ll be redirected to Shopify’s sign-in page, where once you’ve signed in, you’ll be redirected back to Zapier showing your connected store.
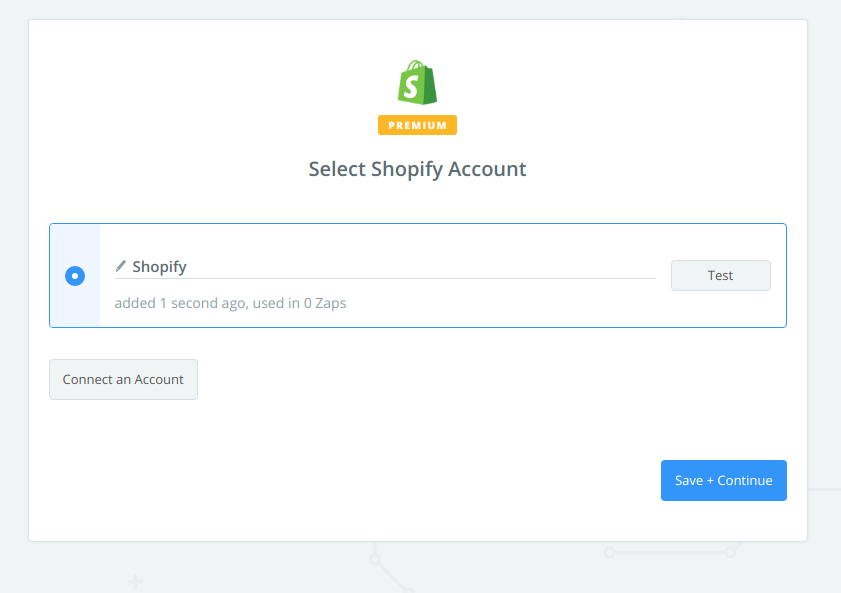
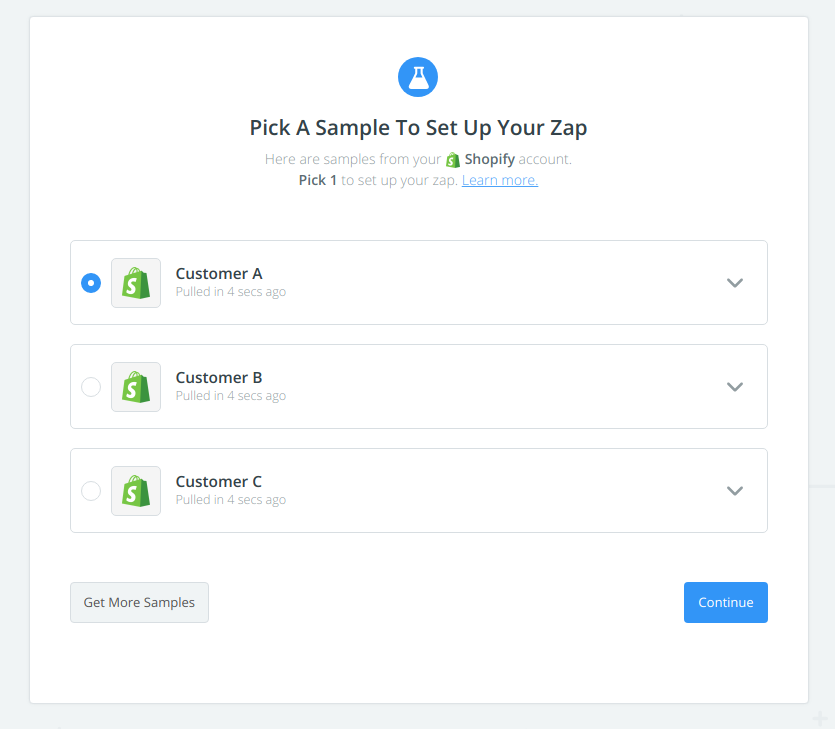
Click on ‘Save + Continue’ to proceed. You’ll have to select a sample customer to continue setting up the Zap. Click on a ‘customer’ to proceed.
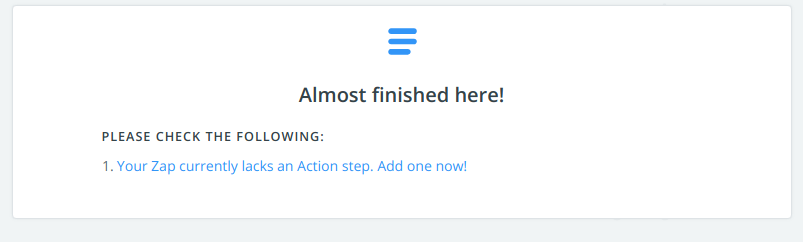
After selecting a Sample customer, you’ll be asked to go to the next step and set an action for the trigger, in another app – in our case, Mailchimp.
Step 4
On the next screen, you’ll be asked to add an action step. Click on ‘Your Zap currently lacks…’ to proceed to add Mailchimp as the action App.
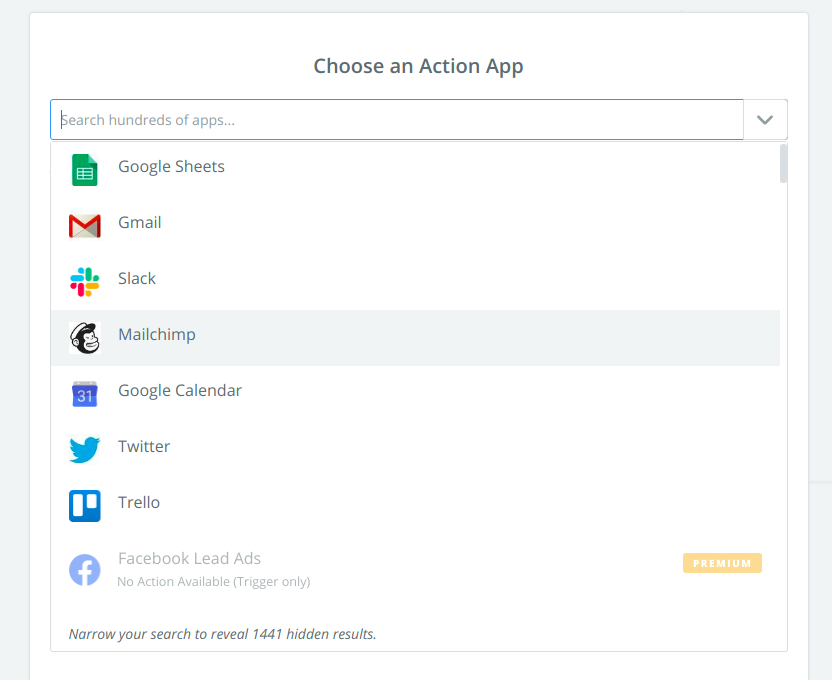
On the screen that proceeds, you’ll see a search box where you need to start typing in Mailchimp. Click on ‘Mailchimp’ in the suggestions as it appears while typing.
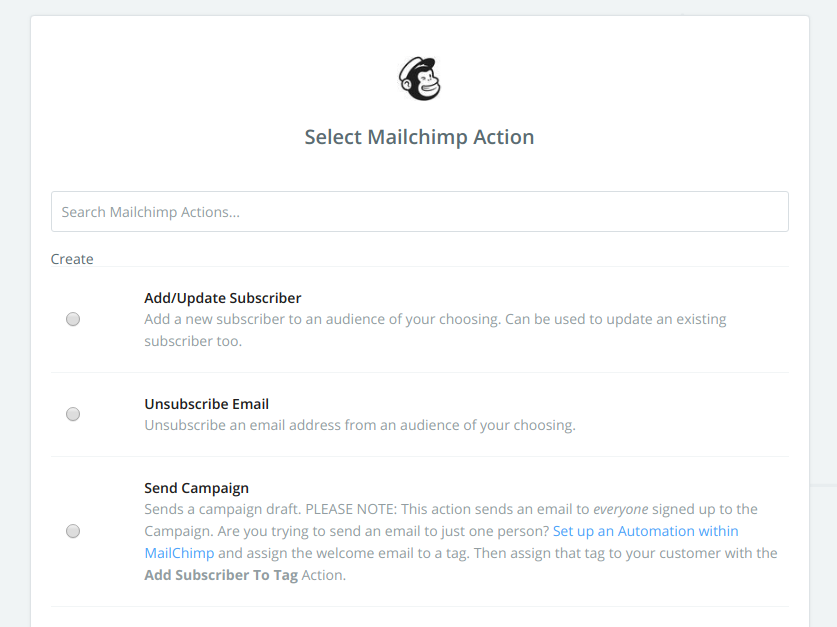
You’ll be presented with the options for actions that need to be performed on the trigger we just set on Shopify. For this tutorial, we’ll select Add/Update subscriber as the action to be performed. So the Zap once set up, will add/update a new user who just registered on your Shopify store to a setlist on Mailchimp – so you don’t need to do this manually.
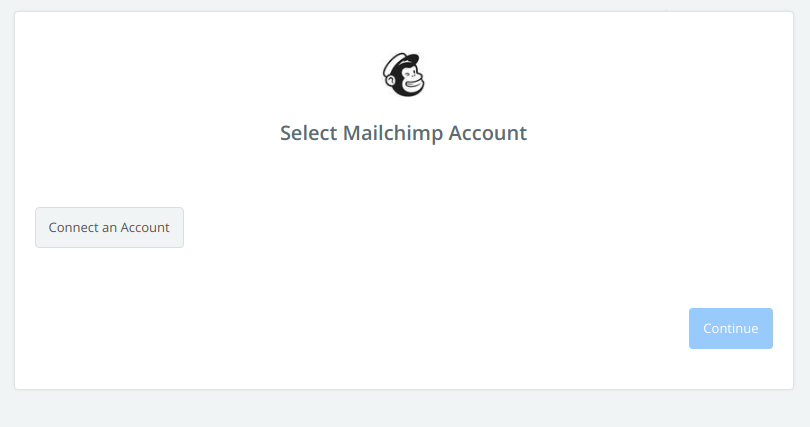
Step 5
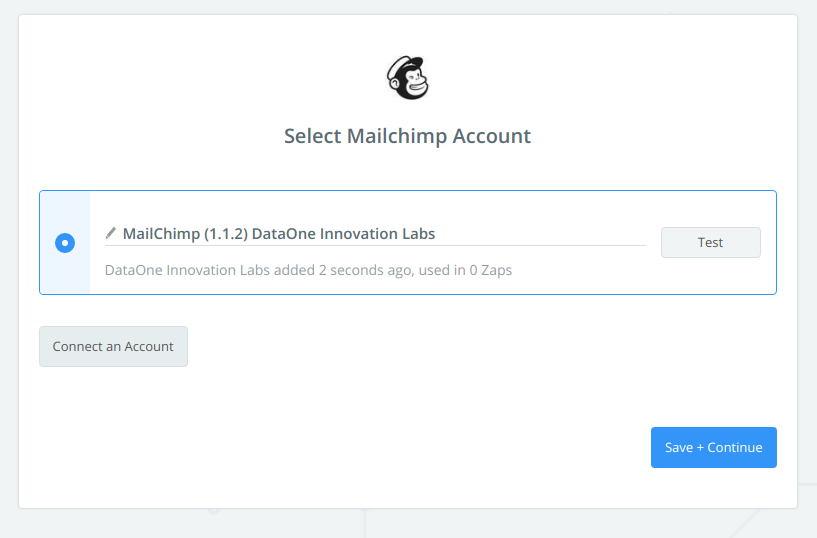
On the next screen, you’ll be asked to connect your Mailchimp account. Once you click on ‘Connect an Account’ – you’ll see a Mailchimp sign-in page open up in a new window. Once you’ve signed in, you’ll see your account listed on the next page. Click on ‘Save + Continue’.
In the next step, you’ll need to provide specifics with respect to the email list you want to add/update a new user with, along with opt-in, replace and update options.
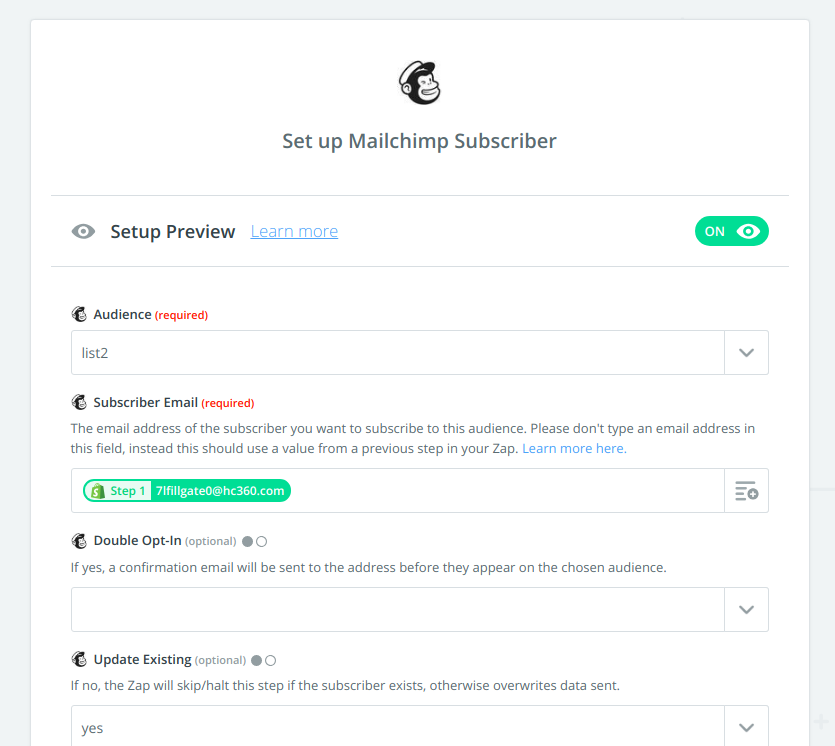

Note – Only two fields are required here (Audience & Subscriber Email) and the rest aren’t – we can totally skip these unless you want the Zap to function any other way. To proceed, click on ‘Continue’.
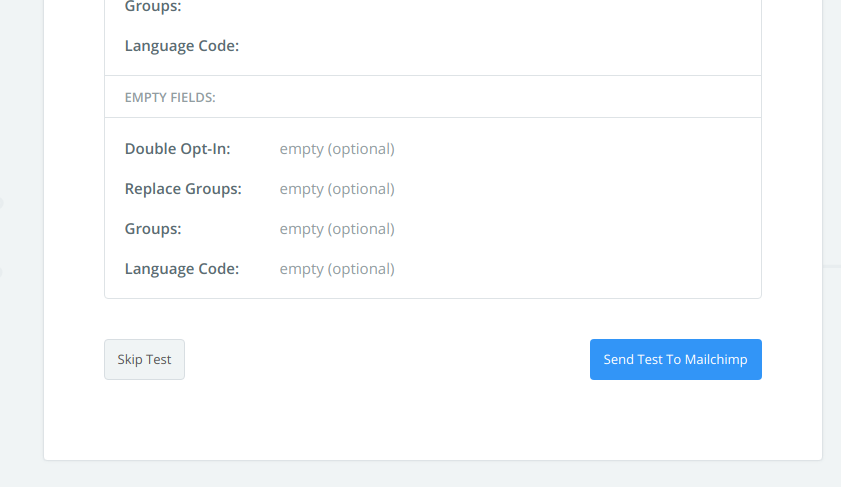
You’ll see a summary of the options you’ve set for Mailchimp, and once you’ve confirmed all of it, you can go ahead and test your settings to see if everything works. Click on ‘Send Test To Mailchimp’
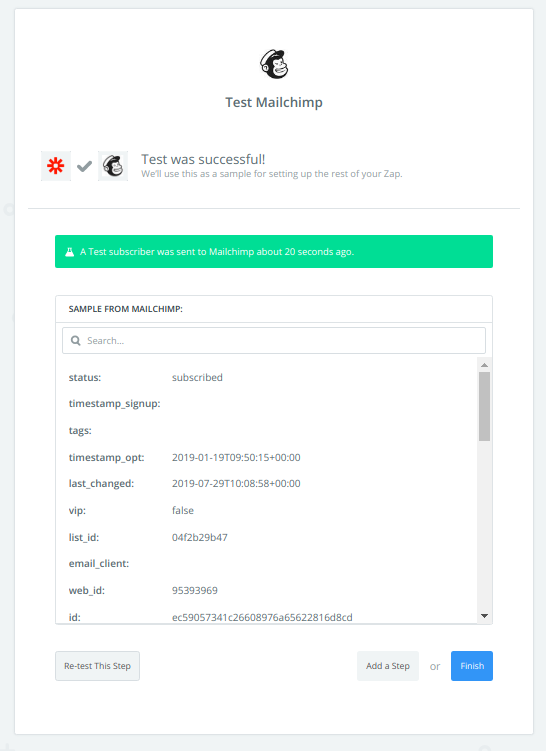
You’ll see the above screen once the test is successful. Once you’re here, click on ‘Finish’
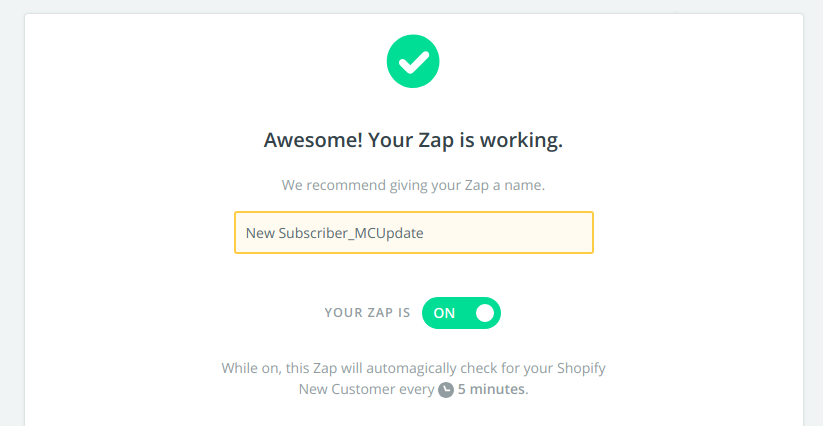
Your Zap is now completely set and will automatically add a new subscriber to your set Mailchimp list when a new user ‘Signs Up’ on your Shopify store. This can be repeated for all the available triggers available on Shopify along with the supported actions on Mailchimp – including sending emails, using ‘Send Campaign’ and ‘Add subscriber to tag’ action steps, depending on how you want to send it. In case you face any problems during the setup process, you can always get the help of Zapier’s awesome customer support.
In the next article, we’ll go through the steps to link your Shopify store to Mailchimp using Automate.io – stay tuned! Meanwhile – check out the first article in the series with instructions to integrate Mailchimp with Shopify using Shopsync.
There is no ads to display, Please add some


